Bali

Bali – Kuta & Gili Islands

I hope everyone who sent me questions about Bali enjoys the detail of this post. Keep reading to find out lots of my tips and recommendations on Bali, it is a long one so kick back and enjoy my lovelies.

P.S I’m guessing you are planing a trip to Bali if you are reading this, firstly you will love it, secondly please take me back with you!

Gem x

The figures included in this blog post are an approximate conversion of Indonesian Rupiah (IDR) to Australian Dollar and GBP. 

Kelapa Villas

If you guys follow my Insta-Stories (@gemkenblog) you will know Bali was a very impulsive last minute holiday.

Niall and I headed back to Sydney for a weekend during our regional work to celebrate our friend’s birthday’s. Whilst there we ended up booking flights to Bali late Sunday night for a Monday morning departure. Last minute at it’s finest.

Were we organised? Absolutely not. Were we packed?  Absolutely not.  Did we have the time of our lives? Absolutely.

Tip: Try to book your flights in advance. Who are these people that find last minute deals? Show me them please. We paid $2157.00 for flights alone. (We could have flew home for that!) I mean being spontaneous is all well and good until you hit double pricing for flights.

After booking our flights we went straight to sleep (so organised, so prepared) and set an alarm for 6:30am to get ready and pack. We were leaving for the airport at 7:20am – 40 minutes is plenty of time to sort ourselves surely….

We were like two children on Christmas morning, running about the house trying to find holiday bits and bobs to jam into a suitcase. Surprisingly neither of us were in any way stressing, it was all laughter and pure excitement which set an amazing tone for the whole holiday.

Arriving in Bali

We touched down in Denpasar airport and hadn’t a clue what we were doing! A few months prior our friends had holidayed to Bali and were telling us about this amazing tour guide they had the whole time. We connected to the airport WiFi and made contact with Epic Holiday Tour & Travel. Vicky Sinatra was the name of our driver and he told us he would be with us in an hour.

Tip – if you are landing in Bali at a peak hour with other aircraft arrivals sprint to immigration! We made a rookie mistake of having a pee before joining the ever growing queue of people, 90 minutes it took us to get through immigration *eye roll*. Also bring a pen in your hand luggage, we waited about 20 minutes for pens to fill out the immigration documents.

Fast forward to baggage claim. We grabbed our bags and ran out to see Vicky standing with a name sign, in we hopped to the car and set off to the hotel. Our 40 minute taxi fare from the airport to the hotel cost 150,000 Rupiah  ($15/ £8). On the way to the hotel Vicky gave us loads of recommendations and we booked him for a few days to tick off some of the suggested activities.

Highly Recommended: Vicky is the most care-free, chill person we have ever met. He was our personal driver/photographer/comedian the whole time! His English is amazing and he is contactable via Whatsapp and Facebook. Tell him you know us and that I’ve recommended him, I told him I would include him in my blog post for which he was incredibly grateful for.  Number: +62 819-1621-0131 Facebook: Epic Holiday Tour & Travel

Tip: If you don’t opt for a tour guide I suggest downloading the Grab App which is basically Bali’s version of Uber.  Uber can be used in a select few areas but it isn’t as accessible in Bali as other taxis.
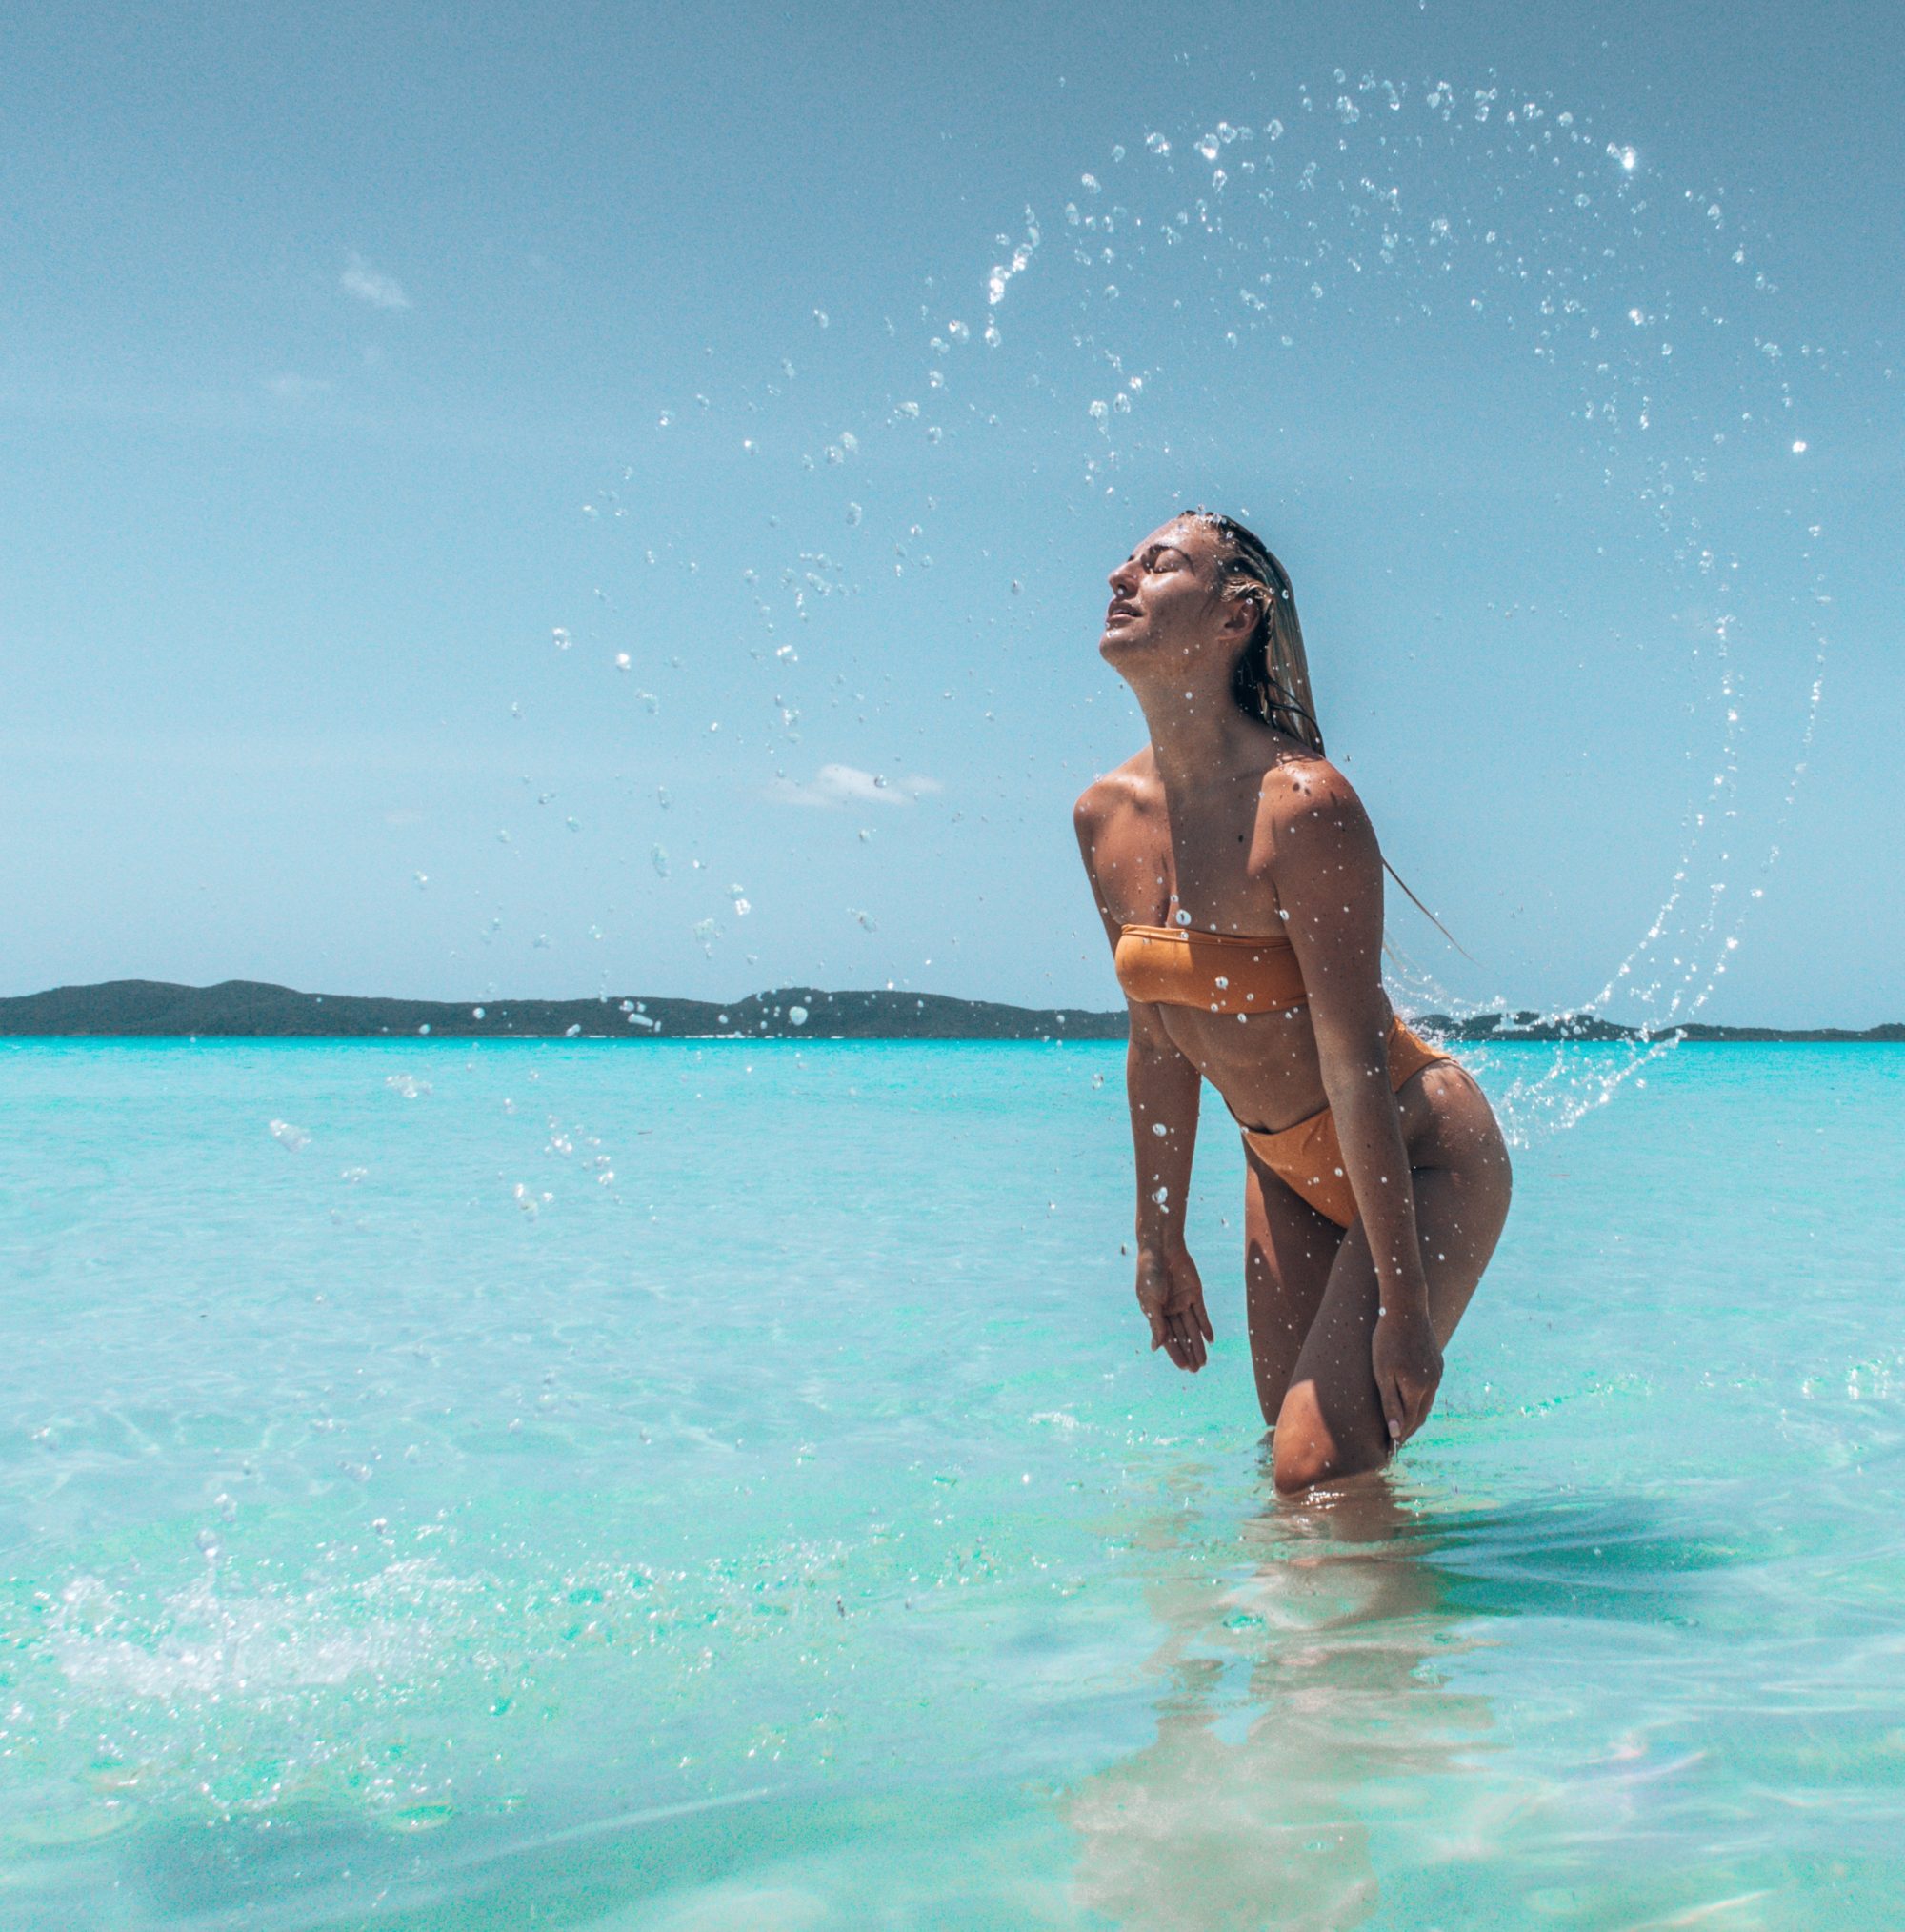
NIGHT ONE

We chucked our poorly packed cases into our room, changed quickly and headed to the beach to catch our first Bali Sunset on Kuta Beach. I am an absolute sucker for a sunrise/ sunset, they just bring harmony to my soul and a cheesy smile to my face. When the sun had disappeared we took ourselves to the Hard Rock Café to eat our body weight in burgers!

Sunset on Kuta Beach (Had to screenshot from my Instagram video so picture quality is poor)

As far as prices go, The Hard Rock Café is not the cheapest when compared to ‘backpacker’ Bali prices. But we were starving and the watermelon mojito was calling my name, so in we went.

Meal price: 850,000 ($85/ £50- main and drinks)

After dinner we made our way back to the hotel via some street markets to call it a night after a long days travelling.

We stayed in the Bounty Hotel, Kuta. It cost around 1,800,000 IDR ($180/ £110) for a three night stay with breakfast included.

DAY TWO 

We got up early to have breakfast and fuel our bodies for a day of exploring.  Vicky collected us at 10am and we made our way Ubud. En route we stopped off at the Tohpati Bali Batik where Balinese locals can be viewed working on amazing garments. Hand stitching, painting, weaving and sewing magnificent pieces of clothing outside one of the last factories in Bali which still use these hand techniques. I bought a cute scarf which was 80,000 IDR ($8/ £4.50).

Tohpati Bali Batik

(Picture credits: Pintrest. I only took videos and forgot to snap a quick pic)

Coffee Plantation

We arrived at the coffee plantation at 12:30pm and by this stage Niall was eager for his caffeine fix. We were greeted and taken on a mini expedition showing us the process of creating the coffee. We were then guided to a cute hut overlooking the beautiful rain forest where we chilled on beanbags and sampled copious amounts of coffee.

Niall’s two favorite things in life: bean bags and coffee

Cat-poo-chino

Luwak coffee is the coffee we were there to taste, known as the most expensive coffee in the world due to the process undertaking to produce it… The process goes a little something like this: a small furry animal consumes and digests the coffee beans. The beans are fermented in their tummy and once it’s pooped out the beans go through a few processes of cleaning, roasting and grinding. Hence the nickname Cat-poo-chino.

We’ll take 17 Cat-poo-chinos please

After 17 tasters of coffee we were all buzzed up to explore the beautiful  surroundings. The grounds around the place is so stunning with lots of cute places to chill and adventure.

Mr Lover Lover – Coffee Plantation Love Nest

We finished up at the coffee plantation and were ready for Vicky to take us to the next destination, the rice fields.

Rice Terrace

We walked through the little markets and purchased conical hats to culturize ourselves (and for the cute insta pics of course).

Rice Terrace Entrance

Entrance into the rice fields cost 20,000 IDR ($2/ £1)  with a donation point nearer to the top also. We walked up to the top to gaze at the incredible view and hang out in the Bali Corner.

Bali Corner, Rice Terrace

We explored the rice fields for an hour. At this stage our friends were due to land in Densapar airport and so we made our way back to them, via a pit stop in McDonald’s. Of course.

The cost of the taxi from 10am-5:30pm was 500,000 IDR ($50/ £30).

We arrived back to the hotel just minutes before the rest of the crew landed. We all quickly changed with strict instructions to be at the bar in 20 minutes. After a few bevvies in the hotel bar we headed out to Jamie Oliver’s restaurant followed by a mad night out in the Sky Gardens.

Jamie Oliver Restaurant (approx $40 per head /£22 -main and drinks)

Sky Gardens

We paid Sydney prices for a table which was a laughable, shitty little table on the side of the dance floor lol – BUT it included a free buffet. I know, a buffet in a club? Life Goals. I was eating mash potatoes in between dances moves. The mash in Sky Gardens was insane, bear in mind all I had eaten for the past 5 months was McDonald’s and take outs (farm life) so I really couldn’t get enough of it hahaha.

There was 7 different levels with different music on each floor. It was huge. We drank bottles and they weren’t too much cheaper than you would pay at home.  Bottle Vokda: 800,000 IDR ($80, £50) Moet: 1,200,000 IDR ($120, £70). We made our way home around 5am after a final pit stop via the buffet, we really got our moneys worth on the spuds anyway.

DAY THREE

It’s safe to say we had a chilled out pool day to recuperate ourselves, dying heads all round! In the evening we took a stroll around the mall which was amazing! We visited a huge candy store and I satisfied my sweet tooth with Reeces Pieces, Pic n Mix and Hershey’s.

The previous 2 nights we had passed a restaurant that was queued out the door both times. On the way back this evening  we were lucky enough to wiggle into a spot. The place was called  Fat Chows, it was sooooo delicious and the cheapest meal we had! (Approx 200,000 IDR per head $20/£11- starter, main and drink)

Fat Chows- Cashew Chicken
Fat Chows- Starters

After dinner we done some street bargaining for trainers to wear on our hike up Mount Batur and went home to get a few hours sleep before our 1:30am alarm.

DAY FOUR

Mount Batur

(Note: none of these pictures are filtered. It really is this beautiful!)

Mount Batur involves a hike up the active Volcano which is 3500m high. It is home to lots of monkeys and quite possibly the most instagramable sunrise in the world.

Vicky picked us up at 2am in Kuta to have us at the bottom of the mountain for 4am. Due to some traffic we were set back 40 minutes and I was stressing in case it prevented us from witnessing the sunrise. We arrived a little later than expected so we jumped straight out of the car, met by our mountain guide, grabbed a torch and began our ascent at 4:40am

About 1 hour in to the trek, we bypassed the clouds and glancing over our shoulders was the most stunning view ever witnessed. Being above the clouds we were shielded from the world below by this thick marshmallow like blanket, and looking up to the night sky, it seemed we were close enough to touch the dazzling stars.

Mount Batur- just as the sun started peaking

It took us 1hr 20m to reach the top. The sun was set to rise around 6:15am so we had made it with 15 minutes to spare. We sat our bags down and just stood speechless, taking in the view and looking at each other in disbelief. It was one of those ‘pinch me’ moments. I could have cried I was just so happy in that moment in time.

Mount Batur

The sun rise was positioned perfectly in front of us and the absence of clouds blocking the view made for the most incredible explosion of colour as the sun peaked up from beneath.

I just couldn’t stop saying ‘OMG’ over and over. I don’t know what it was but it literally felt like I was in heaven, like I could feel something spiritually. Maybe it was because I’ve never witnessed anything more beautiful, or maybe it was because we were so high in the sky and were talking about family members in heaven. I don’t know how to really put it in to words, but when I tell you I could have cried with happiness, I actually mean I was choking back happy tears. Maybe it was just the altitude going to my head… 

Mount Batur

We spent the next few hours watching the sun rise higher and higher in the sky, capturing unforgettable moments on our camera.  We walked around the mountain learning about the sacred ceremonies and Niall made mates with some monkeys.

Two Monkeys (Had to screenshot from video so picture quality is poor)

We began our decent  back down, which was slippy AF. The volcanic ash just slides from under your feet. At this stage my feet were killing me, I swear I had blisters (good ole $5 haggled trainers) and I couldn’t wait to get to the Hot Springs.

Tips for climbing Mount Batur

  • Get a mountain guide (helps you with the path and provides you with a torch).
  • Take a bottle of water.
  • Wear a mini backpack so you have your hands free (slidy on the way down).
  • Take a pack of tissues for a pee.
  • Take some money for snacks / take snacks of your own (there are people selling food and drinks along the way).
  • Wear comfy worn before trainers, not the ones you bought for $5 off the market or you will have blisters.
  • Take an extra layer as it will be very chilly until the sun rises! I was wearing shorts with tracksuit bottoms over the top, with the intention of taking the tracksuit bottoms off at the top when the sun came up. Even when the sun came up I was still cold because of the crisp, dewy mountain air.
  • Make sure your phone/camera is fully charged.

HOT SPRINGS – Toya Devasya

HOT SPRINGS – Toya Devasya

We went to the Toya Devasya Hot Springs to soak and relax ourselves in the natural earth heated pools for a few hours with lunch and drinks. There are four different hot spring pools where you can soak in the minerals, refresh and rejuvenate after the hike.

Price for return transport, mountain tour guide, entrance into Hot Springs: 800,000 IDR  ($80/ £45)

Finn’s Beach Club Seminyak

On to the next location of the day! We made our way to meet the rest of the gang at Finn’s Beach Club. It was Yassu’s birthday and what better way to celebrate than at a beach club sipping cocktails! We got a bed by the pool and lived it up eating and drinking like lords.

Bed- minimum spend: 1,500,000 ($150/£85).  Price Per Bottle: 60,000 ($60/ £35)

We left Finn’s Beach Club around 8pm to go back to the hotel and get changed for a birthday meal fit for our princess. We went to the fanciest restaurant I think I’ve ever been called Double Six, Seminyak. There was a man in a white tux playing a saxophone to us whilst we ate our steak- so extra. To be honest we had all had a few too many bottles at Finns to fully appreciate the experience lol.

Bill: Mains & Drinks for 6 people 4,650,000 IDR ($465/ £260) 

After dinner and a few more drinks Niall and I called it a night as we were on the go 24 hours straight at this stage. We really were squeezing as much into our time as possible because the following day we would leave the mainland to enjoy our last few days in Gili T.

DAY FIVE

We woke up and quickly packed a mini bag to take to Gili T, leaving the remainder of our luggage in the hotel. We all took our seats on the hot and sweaty bus and opened a few Bintang Beer to keep us cool. It takes about 1 hour to get from Kuta to Padang Bai by bus. The boat journey took about 90 minutes.

Price: 750,000 IDR per person ($75/£40) includes return transport from hotel and boat trip to Gili Islands. Bintang Beer: 20,000 IDR ($2/£1)

Gili Trawagan

Gili T- Palm Tree Heaven

Whats not to love about island life? Palmtrees, Coconuts, Private Villa, Hammocks, Turtles, Bicycles & the most magical sunsets- sounds like a dream but this is how we spent our last few days in Bali.

When the boat docked at Gili T, we were put onto the horse carts which took us to our Villa. (The only transport on the Island is Horse & Cart or Bicycle, some of the horses would make you cry they look malnourished. We fed and watered them when we could and walked where possible.)

It was about a 10-15 minute trot from the boat to Kelapa Villas which cost 50,000 IDR ($5/ £3).

Gili T – Horse and Cart

We stayed on the sunset side of the island at the amazing Kelapa Villas. Our Villas names was Mimpi and she was beautiful- I didn’t want to leave her ever!

The doors opened and in we walked to our very own paradise, greeted with fresh coconuts. We all dibs’d our rooms and bombed into our private pool.

Gili T- Kelapa Villas, Mimpi

We had left our speaker in Kuta so we paid a staff member to go buy us a speaker and bring it back. We could hear him before we seen him, back he came with Avicii pumping and we were all buzzing! The vodkas were poured and the music turned up. We were definitely living our best lives.

Tip: Split the cost of a villa between friends and it works out similar cost to hotels, and I know which i’d prefer!

We had a few laughs around the pool before we decided we should explore some of the island as we had limited time here. We went to the main strip, where we read many reviews on the great nightlife BUT it was Ramadan and the music had all stopped early. There were still a few places serving drinks so we sat ourselves down on some bean bags on the beach and had a few Bintangs.

On the way home we stopped with one of the locals to book a day out swimming with the turtles and seeing the other two Gili Islands, Meno and Air.

DAY SIX

I woke up, opened my bedroom door, took 5 steps and launched myself into our pool- Holiday Vibes.

Gili T- Kelapa Villas, Mimpi. This was taken from my bedroom door.
Kelapa Villas- Breakfast

We ate our breakfast at the Villa before spending the day exploring around the islands on the boat. We hired out the whole boat to ourselves because it meant we weren’t restricted time wise in places we wanted to spend a little longer.

Snorkeling with Turtles

We snorkeled with turtles at Turtle Point in front of Gili Meno and stopped off for lunch on the beach.

Hello Mr Turtle! – Gili Meno- Turtle Point

When we got back to the Villa in the evening we were racing against time as it was almost sunset and we wanted to get that famous picture on the sunset swing. We showered and dressed for the evening (pointless because we all got soaked and had to come back to change again haha).

Along the stretch of beach are many swings and hammocks, plenty of opportunity to get your picture without having to wait on others. It is just as beautiful to enjoy them in the day, chilling on a hammock in the ocean is total relaxation!

Gili T – Sunset Swing

Gili T- Ocean Hammock

DAY SEVEN

And so our time in our villa was almost over… We woke up and packed up all our stuff, said an emotional goodbye to Villa Mimpi and off we went to have our last island breakfast.

The most beautiful walkway to breakfast – Kelapa Villas
Kelapa Villas – Breakfast

After breakfast we went to the beach to ride horses along the water and soak in our last morning on the island.

Note: The food on Gili T outside of our villa was not that impressive, or at least the places we ate weren’t. We had two bad evening meals which weren’t even worth including because they were rank.

We grabbed our bags and headed to the boat to make the return journey to the mainland. We sat top deck on the boat, the music was up full blast and the Bintangs were once again flowing for the final time. We had great craic on the boat and really made the most of every second. The thing was,  Niall and I were returning to Australia to complete our regional work so we really wanted to make the most of the holiday, which we most certainly did!

Boats & Bintangs

Off the boat we hopped and at this stage we knew if we had of got our prepaid bus back with all the stops we wouldn’t be able to go via the hotel to get our luggage, due to the time and our flight. So we decided to hop in a private taxi and make our way back to Kuta. This didn’t make a difference. The traffic was horrendous, standstill, going nowhere. Each time we asked the taxi man how long his response would be ‘another 1 hour’. 2 hours later he was still telling us ‘just one more hour’. We were cutting it fine to our flight time so we made the decision to leave our luggage at the hotel and pay for the others to bring it back. It was going to be cheaper to pay for our luggage than it would have been to pay for 2 more flights (we had already paid out the nose for the first set of flights).

Luckily I had the passports in my hand bag so we scrapped going back to the hotel and just set straight for the airport. We made the flight in the nick of time. What a whirlwind of a trip, an extremely last minute booking made for one of the best holidays of our lives.

Tip: The weather forecast for Bali often states rain/ tropical thunderstorms, take this with a pinch of salt as we had fantastic weather despite the weather app suggesting otherwise.  A few people I know have said the same.

Tip: Try wrap your head around the Bali currency before you go. It is confusing AF, well at least it was was for me. (Luckily Niall stopped me from paying $500 for a massage & pedicure, it was only suppose to be $50. From this point on Niall controlled the money lol)

I did actually vlog a bit of Bali, but I haven’t even got around to looking at all the footage. It was my first time vlogging so I’m not sure what way it will turn out plus majority of the time we were Bintanged so i’d say it will be hilarious if nothing else!!

I still have my Thailand stuff to post but due to the Bali blog being so requested I wanted to get it up first for you guys. If you found this blog helpful please give it a like/comment/ repost. It really means a lot to me that you guys read my blog and ask me for my advice.

I’ll be working away on my Thailand blog/video and Bali vlog. Ideally I’d love it all up before i go to Fiji in a few weeks! And on that note, if you have any Fiji recommendations please send them my way!

Big LOVE, Gem Ken x

Gili Islands have been shut off due to the recent earthquakes in Lombok. I have included a link to help the Balinese locals if you wish to do so. I donated the price of a G&T, if you want to help use this link to do so. They are almost at the target of $76k!

Catch Up With Me

Hi guys,

I know it has been a while since my last post and to be honest I have no real excuse other than I have been living my best life, having way too much fun embracing the Australian life and making plenty of unforgettable, incredible memories! I have now been here 6 months!! SIX FRICKING MONTHS– how is that even possible? It feels like I left home yesterday, the time is just running away! I thought I would just write a quick ‘catch up with me’ blog before starting back into my regular blog posts (which is my New Years Resolution – stop being so shite with the blogging!)

So stick the kettle on and throw your feet up whilst taking a few minutes to catch-up on what has been happening.


November- AKA – My Birthday MONTH

I kicked off  November with a trip to Perth. It was so amazing I will have to dedicate another blog post to it with all the ins and outs of my little adventure as there is just too much to try squeeze into this blog post. Perth is so so beautiful I cant wait to show you all my pictures and blog about my recommendations.

Since my last blog post I’ve aged a year, It was my 24th birthday late November. Reflecting over my 23rd year I cant help but smile. There have been so many changes which have raised new opportunities, countless experiences, travelling, friendships, and made me come to the realisation of what actually matters and an appreciation for life.


Birthday Week Shennanigans

Niall was on nightshift my birthday week so I took a few hours off work to spend some time for bday brekkie cuteness.  When I arrived into work my desk was decorated with balloons and as the day progressed more and more cute gifts stacked up – 90% of which was unicorn or mermaid themed haha. 18 of us headed out for a boozy lunch and I basically spent the rest of my day skipping about the office and blowing out candles – it really wasn’t a bad days work.

I arrived back home to a fully decorated house (the absolute cutest) and my pressie from Niall which was a 5 day trip to Whitsundays with 2 nights staying on a boat – INSANE! I can’t wait to go but we have pushed the trip back  because we have so much planned over the next few months which I will chat all about later.

I had a Big Birthday BBQ (true Aussie style) on the night of my birthday and it felt so special, all my friends I have made since moving here came and enjoyed a burger and a beer in celebration. It was so bizzare having my birthday in hot summer heat, every other year I have celebrated with nights out followed with a visit to the Christmas markets.

Moving on to the Saturday of my birthday week. My morning started with a FaceTime from home with the amazing news that my wee brother had just won a GAA All Star Award. I was buzzing about my house, jumping and squealing to my family on FaceTime in celebration. The smile couldn’t be wiped off my face I couldn’t be any prouder of him, it was the best start to the day! For my birthday celebrations we headed to ‘SENSATION WHITE’ which was an all-white outdoor festival and boy was it unreal. It was absolutely insane!

November was mad for Birthdays – I helped a few other friends celebrate their birthday’s too and it was NUTS! We drank, ate cake and partied from the start to the end of November! One thing I am absolutely loving about Australia is how close you become so quickly to new people you meet. They really do become your little Australian family and each and every one of them went above and beyond to make me feel extra special on my birthday, especially because it can be an emotional day as you tend to feel homesick on big occasions.  It took me over a week to open my mummy’s birthday card for Gods sake!


December

Open Air Cinema Date Night

We started December with a cute date night to the Open Air Cinema to see Dirty Dancing and it was the cutest ever. When we were just wee babies in secondary school, Niall and I took part in a school play ‘The Ghost of Christmas Past’ where we first got to really know each other. The finale song for the show was ‘I had the time of my life’ and it always takes me back to when we were so young, im talking 13year old me haha. I would love to hoke out the DVD of it im sure we would have some laugh at it!!!

Blue Mountains, Sydney

Mid December  we went to the Blue Mountains and WOW the scenery up are there is incredible, if you are in Sydney please put it on your to-do list. Again, I will blog a full post on this because it was just amazing.


Christmas Vibes…..

I have to say there was no real build up to Christmas here in Australia and I think it’s what I missed the most about home. I hardly heard Christmas songs, except for when I played them myself, if you follow me on snap you will have seen our FAB Christmas trees lol we blasted the Christmas music whilst decorating them and just had a good giggle at our excuse of a tree.

The weekend before Christmas Eve I literally felt like jumping on a plane and coming home for a week to spend Christmas with family and friends. I wanted nothing more than to enjoy my Mummy’s amazing Turkey dinner, homemade bakes and all the festive cheer with my nearest and dearest. I just felt so far away but then I took a step back and realised I should embrace the fact that I’m experiencing something totally different, and actually ‘how lucky am I?!!

Christmas Week

Our Team Christmas Dinner

Since we were lacking the Christmas build up I organised a work Christmas dinner where everyone was in charge of bringing in a dish. It turned out to be amazing, we blasted the festive music and enjoyed dinner, dessert, Christmas crackers and topped it all off with a Christmas quiz.

On Christmas Eve we went around to our friends house for a good ole traditional Irish Christmas Dinner with all the trimmings. There were 13 of us and the dinner was out of this world! Mind you it was my first time eating a Christmas Dinner with 2 fans blowing and every window open possible lol!! Sarah was the hostess with the mostess -the food was delish. All I could take credit for was dessert- speaking of which, I baked 4 pavlovas in a week… My mummy must have taught me a thing or two because there wasn’t a crumb left over. Later in the evening we went for a few tipples down by the beach before venturing home, changing into matching jams and waiting on Santa to come.

Matching Jams

We woke on Christmas day and pranced up the hall to see if Santa remembered that we had relocated to down under- and he had! The presents were stacked up under the ‘tree‘. We all gathered around to open our  cards and gifts. I got to my families Christmas card and at that moment I wished I hadn’t spent 20minutes on a glitter smokey eye complete with a wing and lashes because as soon as I opened it, the tears started to flow and I couldn’t get the tap to turn off. We were all stood around like blubbering messes laughing at one another!

We headed down to the beach to get the obligatory ‘Christmas on the beach pic’. On Christmas day the sun played us and although it was warm, the sky was full of clouds and it was quite windy on the beach. We had a quick dip and a 10minute photoshoot before heading home to get the party started. So the pics were solely for the gram haha Is it even Christmas in Austraila if you don’t don a red red swim suit complete with santa hat on the beach?

Our Brazilian friends (Wendell & Raoni) are DJ’s and they took their decks to our house complete with disco ball and strobe light and I swear by the end of the night it felt like we were in ‘Project-X’  it was the best house party ever!

Well it may have been the the most un-christmassy  Christmas Day ever but I couldnt of had a better day with friends who have become family down under.

In between Christmas and New Years we had a few day trips exploring different beaches and the Figure 8 Pools, so I have a few more recommendations on what to do it Australia coming right up!


New Years

NYE was litttttt, a big group of us went to Hot Dub Time Machine, music was played from the 60’s right up to present.. complete with a firework display and a NYE kiss from Niall it was perfect. We called it a night shortly after as we were going to Ibiza Space on New Years Day.

New Years Day morning we leaped out of bed and headed to the pub to ring in the Irish New Year (11am our time) but the pub was completely jammed and we couldn’t get in so we facetimed our family and friends to wish them all a Happy New Year.

So that brings me to the NY resolutions, have you guys made any or better yet stuck to them?

I try every year and push myself to do something rather than give up on loads, don’t get me wrong I am trying to eat slightly healthier and give up the sweeties but im not going to cut out every food group and drink nothing but water for the full month of January haha

Instead of giving up food groups why not try the below (I know it’s a fortnight late but im sure 99% of us have broken the resolutions we did make so why not give one of these a go)

  • Give up negativity, Ain’t no body got time for that
  • Give up people pleasing- Do you boo
  • Give up being lazy – GTF up and at it
  • Give up being so hard on yourself- Girls we all killin’ it, believe in yourself!

So just eat the damn pizza, smile and BE THE BEST VERSION OF YOU.

Also I just wanted to say, I have received loads of messages regarding people booking their one way flights! I have been trying my best to get back to each and every person, if you want to send me any questions you have I can screenshot them all and do a snap Q&A. Also, have a read at this blog post where I have probably covered 90% of the questions I am getting asked. It must be something about New Year that gets peoples butts in gear to get up and go because it was Christmas Day 2016 when Niall and I decided we would book Australia in the New Year. Actually, I was chatting to my family about it around the Christmas Dinner Table and my older brother laughed and put his hand out to make a bet i’d be sitting at the table this year because I wouldn’t move to OZ!  Poor Conor’s pockets are slighter lighter now haha. I am so excited for you all planning your big move, don’t let anyone tell you that you can’t do something and if they do -just prove ’em wrong (isn’t that right Conor?! lol)

Well that’s definitely enough chat for today! I’m sure you are all sick of ‘and then I went, and then I did…’ haha sorry not sorry. I really like how chilled this blog post feels, it feels more like a little a random diary entry which I love! Let me know what you want to see me write about if there is anything in particular drop me a message, snap me, Facebook me whatever works for you. I’ll leave the social media handles below.

It feels super good to be back! HAPPY 2018!

Big love, GemKen x


Snapchat- GEMKENBLOG

Instagram- GEMKENBLOG

Facebook- GEMKENBLOG

Maybelline Instant Age Rewind Foundation

Hi my lovelies,

I have been excited to write the following review since my first use of this product. Back home I know everyone is obsessed with the Maybelline Age Rewind Concealer and upon discovering the foundation form in Australia I was super keen to try! I hope you enjoy my review.

Maybelline’s foundation game right now is super impressive! I am already a huge fan of the Fit Me Foundation and they have just released a New formula of Superstay 24hr full coverage foundation – I cant wait to get my hands on this to try because from what I’ve heard it is better than the Fit Me Range (how?!!)

Maybelline New York Instant Age Rewind Radiant Firming Makeup

I have been wearing the Maybelline Instant Age Rewind Foundation for the past three weeks daily (except for nights out as it isn’t super full coverage). A few of you have messaged me asking about the foundation and it had multiple screenshots when I posted it on snap so I thought it deserved a post to describe it in more detail.

It has quickly became one of my most-used day foundations and im going to run you through why…

It works really well when used in combination with primer and set with powder. It is easy to apply and gives a nice medium coverage, which is just perfect for daily makeup looking natural on the skin.

Consistency: Lightweight and glides over the face well, allowing time to blend it in evenly without sinking into the skin too quick. It’s not too greasy despite having SPF18 which was surprising.

Coverage: The coverage is medium which is why I find it perfect for a day foundation.

Price: It is super affordable

How I wear it: I pair it with 2 other Maybeline products the Baby Skin Instant Pore Eraser primer and the FIT Me Matte & Poreless Powder to set.

What I dislike about this product

The Packaging: it’s a screw top glass bottle and I am not a fan of pouring out foundation on to a brush, you have lilt control and usually end up with far too much product. It also encourages you to dip your brush in the bottle which is unhygienic and can cause a build up of bacteria unless you wash your brush after every application! I think it should definitely feature a pump as this would be less messy and a lot more practical.

Where is it available?

I picked mine up in Priceline Chemist (Australia). I have never seen this foundation back home so I have looked it up on Amazon and you girls can avail of it from this link.

I would recommend this foundation for people with dry, normal, combo skin type. I would avoid it you are oily as even with a primer and setting powder it doesn’t really mattify so it will slide off your skin.

For colour guide purpose I wear NC37 in MAC and the shade I have been wearing in this foundation is 220 Sandy Beige. The product doesn’t oxidise and stays true to the shade.

Blend-ability: 10

Coverage: 6

Lasting power:

Price: 10

Packaging: 0 (because there is no form of dispenser which I was immediately disappointment by)

Im going to give this foundation an overall 6.5/10.

Additional notes: I have sensitive skin and it hasn’t broke me out. All pictures in this post are filter free and in natural daylight for a true representation of the product coverage.

GEMKEN GIVEAWAY


If you’ve entered my major giveaway then keep reading to hear all about the incredible prizes in more detail before the winners are announced on Sunday!

Due to the generosity of local businesses I have THEEE most amazing prizes. The total prize is worth over £700 and due to the amount of beauty vouchers and products  I have decided to spread the love and choose 3 lucky winners.

So, what are the prizes?

Each prize is equally as insane as the next. Like seriously, can you cope? I’m imagining myself enjoying each and every ounce of the products, vouchers, makeup & PT lessons….. Do I really have to give it all away? I WANT IT ALL.

Prize One

1-1 Makeup Lesson with Perfectly Polished Hair, Beauty & Cosmetics

Stefan Smith – Health & Fitness 1-1 Personal Training Session

IMAGE Skincare set

Delashful full set of individual eyelashes

Ciara Duffy Hair- Blowdry of your choice

Diamond Earrings from The Pine Box

Phil Smith Be Gorgeous Aragon Oil Cream

 UTan and Tone tan & body firming sample

Tantastic fast developing tan sample

Inis Energy of the Sea Fragrance

Rimmel London Products

Garnier Moisture Bomb Sheet Mask

Facemask Applicator

Aragon Oil Hair Treatments

A bottle of Prosecco

Prize Two

Passion Hair, Beauty & Spa £25 Voucher

Lula Belle Beauty HD Brows

Urban Hair £30 Voucher

Cleanse off mitt by The Skin Nerd Jennifer Rock

SOSU Sophia lashes

BPerfect Cosmetics 10 Second Tan

BPerfect Cosmetics Eyeliner Pencil

RÍ NA MARA Irish Seaweed Cosmetics Purifying Micellar Cleansing Water

John Frieda UK Shampoo & Conditioner

Declaré Beauty & Wellbeing skincare samples

Aragon Oil Hair Treatments

Wet ‘n’ Wild lipgloss

Primark P.S Metallic Eye Pencil

L’oreal Paris eyeshadow

A bottle of Prosecco

Prize Three

Kérastase Hair Products

Polished Boutique Make-up with lashes application

Ted Baker bracelet

Hair Boudoir All Over Colour

Baby B Browne tan

Revel Eyelashes 2x styles: Rebels & Queens

Chloe’s Nail & Brow bar £20 Voucher

Declaré Cleansing Powder

Sanfilippo Wing it Wing Liner Stamp

GOSH Eyeshadow

Eucerin skincare samples

Aragon Oil Hair Treatments

Rituals Cosmetics Handcream

Galgorm Resort & Spa £10 Voucher for spa treatment

A bottle of Prosecco


How can you enter?

I have 2 posts up, 1 on Facebook and one on Instagram (use the handle @gemkenblog or click the links)
Click into either post and like, share, comment, tag & follow to your hearts content.

For the girls who go on and subscribe to my website mailing list- they will have their names entered in double the amount. This is just to show appreciation to those who go the extra mile. So now that your here, pop your email address in the updates box and confirm by clicking the acceptance button in the email to follow.

What are you waiting for? GO NOW- ENTER, ENTER, ENTER!

How am I announcing the winners?

I will announce the winners on Facebook live this Sunday on my Facebook page GemKen Blog.

My reason for announcing the competition on Facebook live is because I want everyone to know they have an equal chance and i’m all about everyone having the fairest chance possible.

Thankyou, Thankyou, Thankyou.

I would like to thank each and everyone of you for entering the giveaway and following my blogging journey.

I also want to thank the following business for their support and generosity: Maura’s Beauty Clinic,  James Taggart Hair Studio, McCall Jewellers, Perfectly Polished Hair, Beauty & Cosmetics, Stefan Smith – Health & Fitness, Rococo Hair & Beauty Boutique Cookstown, Lula Belle Beauty, Passion Hair, Beauty & Spa, Polished Boutique,  Dorman Healthcare, O’Neills Chemist, Donnelly McAleer, Delashful, Urban Hair, Ciara Duffy Hair, Chloe’s Nail & Brow Bar, Salon Services,  The Pine Box & The Hair Boudoir.

And finally I want to say a special thanks to my 3 amigos back home, the Prinny’s, my BFFS for helping me by setting up, photographing and videoing the prizes and thank them in advance for packaging up the prizes for the lucky winners.

Goodluck my little Gems!

Love always,

GemKen x

Fleeky Ass Brows

Hi My Lovelies,

This past week quite a few of you asked me what I use on my brows so I though I would piece together a blogpost on the current products I am using.


4 products you will need to achieve fleeky ass brows:

  1. A spoolie
  2. Anastasia Beverly Hills DipBrow Pomade
  3. Angled brow brush
  4.  Browcote Brow Gel


Step 1: Comb your brows with a spoolie before applying any product. The first third of your brow should be combed upwards pushing the hairs up,  then brush the remainder of the brow in the direction of hair growth.


Step 2:  The holy grail product I use for my brows is the Anastasia Beverly Hills DipBrow Pomade in the shade ‘Medium Brown’.

ABH- Dipbrow Pomade

Anastasia Beverly Hills DipBrow Pomade – £18

Each pot contains 4 grams of super pigmented pomade and with a choice of 11 different shades theres a suitable colour for everyone.

A little bit goes a long way and you can build it up to your desired intensity. Most days I only use a little with a light hand to achieve a more natural look for daily wear, but when I want to have super on fleek Insta-level brows this is my go-to product. With the amazing consistency of the pomade you will never have to worry about flakiness or fallout.

The only downfall of this product is that it can dry out easily, so you need to be sure to put the lid back on straight after use.

Tip: If yours has dried out, try adding a few drops of beauty oil to the pomade to turn it back to the gel like texture.


Step 3: Taking an angled brush, I dip it into the brow pomade and then I lightly squeeze the brush between my fingers to flatten the bristles and remove any access product.  I start by making a line under the brow leaving the very start of my brow free of any product for now. I continue by then creating the arch and tail of the brow. Using the remainder of the product on the brush I fill the brow in creating thin strokes.

I brush the product upward from the bottom line and then using a spoolie, I brush the product over to the start of my brow for a gradual faded look. I finish off by brushing the remainder of the brow to shape and distributing the product evenly throughout the brow.

Tip: Start off with a small amount of product otherwise it will end up looking cakey and your eyebrow colour may become too dark if too much product is used.

You can define the brow with concealer to further sculpt the shape (i don’t do this for daily makeup and will include details in a future blog post).

I do have the Anastasia Beverly Hills Dual Sided Brow Brush  (£18) but I choose to use Sephora’s angled liner brush as it is thinner and more precise. I did get this brush about 4 years ago from Sephora but here is a similar one to mine.

SEPHORA COLLECTION Classic Must Have Angled Liner Brush #90


Step 4: Browcote Brow Gel

Browcote Brow Gel £6.99


To finish off my brows I lightly coat them with Browcote to set and seal the pomade. This product is super lightweight on the brows, it doesn’t leave the brows feeling wet nor does it dry in flaky.

The brush wand applicator glides through brow hairs and sets your look effortlessly, it is the perfect size meaning the wand holds the perfect amount of product and doesn’t get any onto the skin surrounding the brows. The gel itself is clear so can work with any brow colour or skin tone.

Available from Superdrug for £6.99 or the Browcote website.


Voila, there you have it – fleeky ass brows that will help you slay all day.

Chat soon,

GemKen x

9-5 To Across The World

Hi my lovelies,

This blogpost details the exact steps I took to get me from behind an office desk to a beach far away!

I hope it helps any of you who are considering or are in the process of the big move.

GemKen x


Why Travel?

Niall and I always talked about traveling , we were both in agreement that it was something we needed to do as soon as we had our degrees behind us.

Our reasonings for travelling? To culture and educate ourselves from something other than a book. To experience life, see the world and embrace the endless opportunities and new friendships. To see what the amazing change of lifestyle had to offer, to learn about ourselves as individuals and about our relationship.

And i mean, who doesn’t want to live by the beach?


Deciding To Go

An easy decision to make- right? So many people talk about it, dream about it and wish about it. Anyone you talk to encourages you to fly the nest and see what’s out there, what it’s all about.

For me it wasn’t deciding to go that was difficult, it was when. When is the right time?

Honestly there is no ‘right’ time. You’ll forever wait if you keep passing up your travels because of events; weddings, birthdays, a lads/girls holiday.

The truth is there is no time like the present, book it, do it, go, go, go.

Book your trip based on when you want to go, don’t book it around suiting other people.

We all have a tendancy to be ‘people pleasers’ and have serious fear of missing out on occasions when the realtiy is there will be plenty more in the future. Whether it’s a few months, a year or a few years longer, with the help of God our friends and family will have many more celebrations to come.

Tip: When booking your trip be sure to set a realistic time frame you feel is comfortable to save your funds.


Applying for a Visa

The very first thing we did was book our Visa. We completed our applications online and the next morning we had confirmation back of acceptance. The application took approximately 30 minutes to complete and by doing it yourself through the Australian Government Website you can save £70 per person.

The visa we are here on is the Working Holiday Visa 417. They cost $440 per person- (£275 approx depending on exchange rate). Australia has recently made changes to the visa meaning its may be slightly more difficult to get one granted depending on your job sector as they are now skilled visas. Be sure to do your research on the visa changes and restrictions.


Booking the flight

We booked our flights in February 2017 to leave in the July. Seemed like ages away at the time but the weeks and months soon rolled in and it was no time to we were boarding the flight.

We booked through STA Travel to a cost of £580 per person. We chose to stop of in Dubai for a few days as the flights were super long.

We flew with Emirates who have a 30kg baggage allowance, maximum weight they will allow is 32kg.

Be sure to research how much weight each airline will give you to get more bang for your buck. Our friends recently flew here with Qantas who have a baggage allowance of 2x 23kg checked on bags per person (46kg!).


Temporary Accommodation 

We booked to stay in an Airbnb because I couldn’t face staying in a Hostel with all my life belongings! It would be different if I was backpacking, but we had so many valuables I didn’t want to risk getting anything nicked. We booked the Airbnb for 2 weeks so we would have enough time to look for new places. The Airbnb also worked out $2 cheaper per night than what you would pay in a hostel.


Join Social Media Groups

Utilize social media, the Irish Around Sydney Group is incredible for jobs, housing, furniture, cars etc.

There are so many Facebook Groups and depending on which area you are going to there is a specific group you can join. (Irish Around Brisbane, Irish Around Perth, Irish Around Melbourne, Irish Around Darwin)


My Australian To-Do List Before Leaving Home

  • Give Notice To Workplace
  • Create a ‘Travel Folder’ to keep all your documentation together
  • Update CV for Australian Market (Resume)
  • Gather up any doctor, dentist & optician files
  • Notify Bank
    • Appoint a trusted Power of Attorney so they can access and control your funds at home.
  • Cancel Outgoing Bills
    •  Car insurance
    •  Car Tax
    •  Gym membership
    •  Automated payments/direct debits
  • Pay off phone contract
  • Pay off any debits (Student Overdraft)
  • Compile important documents and make photocopies
    •  Passport
    •  Visa Confirmation
    •  Birth Certificate
    •  Driving Licence
    •  Qualifications
    •  Employment References
    •  Bank Statement
    • P60 from Employer
    • Travel & Health Insurance 
  •  Print a hardcopy of hotel/ Airbnb bookings and any transportation confirmation.


The remainder of the things listed were completed when we arrived in Sydney.


Sim Cards

We bought pay-as-you-go sim cards and topped them up with $40. We chose ‘BOOST’ network as it had the best offering on Data.


Bank Account

We made our way to the ANZ Bank and set ourselves up with individual accounts, a joint bank account and our Superannuation. Our reasoning behind the joint bank account is due to sponsorship. We have no idea if we want to stay a second year yet but we are keeping our options open and if one of us gets sponsored, the other can go De Facto (basically means a couple can use the same sponsorship). In order to do so you need to prove a genuine relationship, therefor opening the joint bank account would strengthen our proof of relationship.

Tip: Be sure to bring your passport to open your account.


Tax File Number 

We applied for our Tax File Numbers online as soon as we arrived using our Airbnb’s address. It took one week to arrive.

Tip: When filling out your TFN form with your new employer, the answer to the “Are you a resident for tax purposes?”question is ‘Yes’. Answering ‘No’will result in higher taxes and you are not breaking any rules by selecting ‘Yes’, so you may as well avail of a lower tax rate.


Transport

You will need to get an Opal card. It makes getting around super easy and cheap. You simply tap-on and tap-off public transport with a pre-loaded card. You can purchase the cards for $2 in most shops and then you top it up. You can download the app and register your card, if you ever lose it your balance will be transferred to a new card. The app also allows you to top up your card and set up a direct debit meaning no more queuing at peak times to top it up in the stations.

When on a working holiday visa you can drive on a full driving license until your 12 months runs out, I have heard a few people say its only 3 months, but according to the government website legally you can drive until you get residency.


Medicare

We went to the Medicare Centre and filled out the forms, presenting our passports, visas and utility bills with home addresses.

We are both holders of Irish Passports but we technically reside in the UK so we do qualify for MediCare. All we had to do was prove that we resided in the UK with letters stating our home address (utility bills, counterpart of driving licence).

Tip: Bring a few different letters with your home address along with your passport and visa.


Transferring Money

We used an app called TransferWise to get our cash from our Home accounts to our OZ accounts. Our banks were giving us crappy exchange rates and charging fees for international transfers.

Tip- Be sure to bring your card reader if your bank has issued you one, otherwise its impossible to make large transfers to TransferWise.


Getting a House

We got our house through the ‘Irish Around Sydney’ Facebook group. In Australia you pay a bond which is similar to a security deposit. Our rental bond was $1950 so you do need to factor this into your budget.

Rent is shown per week. Make sure you consider the monthly rent, which is the price per week times 52 weeks divided by 12 months. (i.e. our rent is $500 per week which actually works out at $2167 per month, so its really over $500 per week).


Equipping Our Room

Thankfully our house was fully furnished except for a bed. We ordered our bed from Tommy Swiss which is a relatively cheap website. We got our King Size bed frame and mattress delivered for just under $500.

As for all our other pieces; candles, photo frames, mats, towels, bed sheets, quilt, pillows, makeup organisers etc we bought them all from KMart for around $350.


Uber

If you haven’t already got it, download the Uber app for Taxi journeys.


Shopping 

We generally do our groceries in Coles as it is cheaper than the majority of the other supermarkets.

I definitely recommend picking up a few bits in Primark before you leave (especially underwear and swimwear) because even the cheap underwear here isn’t that cheap & it’s not overly cute.

Oh, and teabags- take your fave. My mummy packed me some Punjana and there is nothing quite like a tea from home.


I hope this blogpost helps anyone who is buying a one-way-ticket! If you are moving soon check out my stages of emotion blog, maybe you will be able to relate!  I will have future blog posts soon on recommendations on what to do, where to go & where to eat around Sydney!

Shoot me a message if you have any further questions and I will be happy to help.

Lots of love,

GemKen x


All About That Base

Hi My Lovelies,

I have detailed my 9-step flawless base below, have a read and let me know what you think or if you picked up any useful tips.

Mwah, GemKen x


Follow the steps below to recreate my perfect base!

Step 1- Prep Spray

The prep spray I use is the Urban Decay Vitamin B6. This spray gives your skin a quick hit of vitamins and calms any redness or irritation.

✔ Absorbs oil

✔ Minimizes pores

✔ Reduces redness

✔ Soothes skin

Urban Decay Vitamin B6 Spray

Urban Decay Vitamin B6 £23.50 available here.


Step 2 – Primer

Primer preps your skin for the perfect foundation application.

✔ Fills in fine lines

✔ Smoothes over pores

✔ Increases the lasting power of foundation.


How to use? Apply a pea sized amount of primer with fingers to places where you have visible pores or tend to have issues with makeup not staying on the skin.


My go to ‘on a budget’ primer has to be Maybelline Baby Skin Instant Pore Eraser. It is super comparable to Smash Box Photo Finish at a fraction of the price.

Maybelline Baby Skin Instant Pore Eraser

Maybelline Baby Skin Instant Pore Eraser £7.99 available here. 


Smash Box Photo Finish

Smash Box Photo Finish £26.00 available here. 

I do like Smash Box Photo Finish although due to the packaging its so hard to get the product out when your over 1/2 way through the bottle. At £26 per bottle you want to be using every last drop! Would I buy it again? Honestly-  no, not after finding Maybelline Baby Skin Instant Pore Eraser which is less than a third of the price!

Another primer in my favourites is the Benefit Porefessional. I adore this slightly tinted primer, its super soft creamy texture really does leave a smooth blurred finish on the skin. A cheaper dupe I have tried and tested is the KIKO Skin Trainer CC Blur, another slightly tinted primer that also creates a smooth facial complexion with less visible pores.

Benefit Porefessional

Benefit Porefessional £26.00 available here.


KIKO SKIN TRAINER CC BLUR

KIKO Skin Trainer CC Blur £19.50 available here.


Depending on your skin type, different primers will suit you better. Be sure to have a skin consultation and get your skin analysied so you are using a primer that is right for your skin type. This also will help you find the correct cleanser, toner, mosturiser, serums, foundations etc. Knowing your skin type will benefit your fleekyness!


Step 3- Foundation

I use a combination of foundations for both day & night time. I will describe to you guys my ‘night out‘ mix that works for me and my skin.


Urban Decay All Nighter Foundation
MAC Studio Sculpt


Urban Decay All Nighter Foundation (My Shade is 4.5) £29 available here.

MAC Studio Sculpt (My Shade NC40) £27 available here.

For nights out I mix 2 pumps of Urban Decay All Nighter with a small squirt of MAC Studio Sculpt NC40, I find the coverage and lasting power of these foundations mixed incredible. I pump the Urban Decay foundation on to the back of my hand & squirt some MAC on top, mix it up and apply to each area with a flat brush. Starting with a third of my face (one cheek, half my nose & jaw line) apply with flat brush and blend with a stippling brush in circular motions, once blended move on to other areas of the face repeating the application process.


Step 4- Concealer

I have always applied concealers after foundation. If you have any pimples, red scarring or imperfections, sometimes you may find that your foundation just isn’t full coverage enough, this is when I find its best to lightly apply concealer over the top.

My best tip so it doesn’t go cakey is to use the smallest point of a beauty blender, apply the concealer and lightly dab on to the specific area.

I love the consistency and coverage of the Urban Decay Naked Skin Weightless Concealer . I recently wanted to buy an extra light shade to use under my eyes for brightening but the shades were mostly sold out so I purchased one for concealing spots and blemishes.

From my Snapchat and Instagram stories you guys will have seen how my skin has broken out due to severe lack of sleep (jet lag, sleeping 3-4 hours max per night). So I have been using the Urban Decay Naked Skin concealer over my foundation on the problem areas. I would say the consistency is comparable to Maybelline Age Rewind Concealer (£8.99), but the coverage is hella better.


Urban Decay Naked Skin Weightless Concealer


Step 5- Cream Contour

The cream contour palette I use is from Make-up Studio in the shade light, I purchased it from Paddy McGurgan’s Makeup Pro Store £37.50 also available here.

Make-up Studio Cream Contour Kit

See image below to as a guide to where I put light & dark shades on my face. I apply with two flat brushes, one for light shades & one for dark shades.

Once applied, take your damp beauty blender and dab the contour, pushing the product into the skin. Never rub your contour as this will remove the product from your face leaving you patchy. After patting the product into my face I like to set the areas.


Step 6- Setting Powder

I set the dark areas of contour with the bottom three powders mixed from the Anastasia Beverly Hills The Original Contour Kit (Powder)  in shade ‘light- medium’.

ABH Original Contour Kit

Anastasia Beverly Hills The Original Contour Kit £39 available here.

For the Highlighted areas of contour I like to set with, WAIT FOR IT…

Primark P.S Setting Powder £2.50 (recently rebranded to P.S Banana Powder €4)

I found this amazing dupe for Ben Nye last year and I’ve been obsessed ever since, can you believe its under a fiver and from PRIMARK!?

Primark Setting Powder


How to use?

I pour some product onto my hand, using a  damp beauty blender I lift the product and apply it to the lightest contoured parts of my face

If I am after a super matte long lasting finish for my night out I will bake my face for about 5-8 minutes with the Primark Setting Powder before dusting off with a fluffy brush.


Step 7- Bronzer

MAC Mineralize Skinfinish Natural- Give Me Sun!

I love, love, love Give Me Sun!, it is my ideal shade of bronzer with a cute summer peach undertone. In the airport on the way to Dubai I picked up MAC Mineralize Skinfinish in the shade Dark Deep to try, its more of a golden bronze. I haven’t used it yet so I will keep you guys updated.

MAC Mineralize Skinfinish

Mineralize Skinfinish  both shades £24.50 available here.


Step 8- Highlighter

My holy grail highlighter is MAC Soft & Gentle. I am OBSESSED with it, i can never get away from it.

MAC Mineralize Skinfinish, Soft & Gentle

MAC Mineralize Skinfinish, Soft & Gentle  £24.50 available here.

During my Dubai trip I picked up the new Too Faced Love Lights highlighter in the shade ‘Blinded by the Light’ (£25) and to be honest the pigment payoff isn’t quite as good as MAC.

How do I apply highlight?  To intensify my highlighter I squirt my brush with setting spray before coating it with the product. Apply to top of cheekbones bringing it around your temples and don’t forget your cupids bow! I dab the product on, pushing it into my skin instead of using a fan brush, this is just my own preference and i find it gives a more popping highlight!


Step 9- Setting Spray

The one product which is used mainly throughout (Steps 5, 6 & 8). Setting spray ups your makeup game giving it serious staying power. My favourite setting spray is the Urban Decay All Nighter Setting Spray.

Urban Decay All Nighter Setting Spray

Urban Decay All Nighter Setting Spray £23.50 available here.

Close your eyes, hold your breath and spritz your face 5-6 times with this magical potion and your makeup will last all night!


Voila!- there you have it- my perfect, flawless base with a banging highlight.


Additional Tips & Tricks

✔ Don’t be afraid to mix foundations together to find the right shade, coverage and durability for your skin.

✔ Apply foundation in sections to prevent adding too much, no one wants a cakey face- just the fabulous frosting!

✔ Wash your beauty blender before you start with your makeup, squeeze it dry in the sink, squeeze it again in a towel and then when it comes to needing it just spritz it with setting spray.

✔ Don’t be afraid to ask for samples of any product especially when it comes to  shades of foundations.

✔ Urban Decay All Nighter oxidises meaning it will change colour on your skin after a few minutes of being pumped from the bottle, bear this in mind when selecting your shade.

✔ Don’t test foundation shades on your hand, use your jawline.

✔ Check the shades in a natural light.


Oh My Dubai..!

Hi My Lovelies!

I hope you enjoy my blogpost on Dubai complete with tips, tricks and personal recommendations.

Let me know if you guys found the below post helpful in anyway.

Chat soon,

GemKen x


Oh My Dubai..!

My boyfriend and I stayed in Dubai for 4 nights as a stopover before continuing our journey to Sydney.

We started our journey from Dublin Airport with Emirates and I cant fault the airline at all. The staff were super attentive to the needs of every passenger on the 7.5 hour flight. The drinks were unlimited and the food, well, it was as nice as it could be considering plane food ain’t the most nutritious or delicious!

Everything was provided (blankets, pillow, earphones etc) but it was the attention to detail with Emirates that impressed me the most. Mid-flight they dished out hot lemon water soaked flannels to freshen up with. The air hostesses were all super friendly, offering helpful advice on where the hot spots were in Dubai.


We stayed in The Habtoor Grand Resort, a 5-star hotel located in Dubai Marina just moments away from Jumeirah Beach Residence (JBR).


Day 1 – Monday 3rd July

As the airplane prepared for landing the temperature on the monitor just kept rising. We landed in Dubai at 12:30am to a scorching 39°C. As soon as we exited the airport to join the taxi queue, we encountered the first of the heat; it literally felt like you had opened an oven door with the heat hitting you straight up the face. My glasses fully steamed up, it felt like we were in a sauna, and this was at night time? What on earth were the next few days going to be like? !

The skyline of the city all lit up was amazing to gaze out the taxi window at. (Weird: although the car itself was cool from air conditioning, the windows were radiating heat from the hot air outside)

The taxi to our hotel took approximately 25 minutes and cost 110 Dirham (£24)


When we arrived at our hotel we were welcomed with drinks and escorted to our beautiful room. It was around 2am at this stage and we were both starving so being the foodies we are, we ordered room service and chilled.

Tower King Room with Partial Sea View – 2016 Dirham (£440). Room service cost- 80 Dirham, Pizza & Chips (Approximately £17). Booked through booking.com 


Day 2 – Tuesday 4th July

Our first full proper day in Dubai, we started it off with breakfast around 10:30am. We added breakfast onto our stay upon check in costing us 600 Dirham. No day can be started right without a good breakfast and this way saved us a lot of hassle, money and hangry arguments about where to eat.

After breakfast we took off exploring (by ‘exploring’ i technically mean shopping on this occasion, but calling it exploring excited Niall so I ran with it).

We walked outside and got into a perfectly chilled taxi as by this stage it was 42°C and the heat was unbearable. We set off for the Dubai Mall; where do I start on describing the Mall? It has to be seen to be believed, every shop and food place known to mankind is under one roof, complete with an ice rink, underwater zoo, aquarium, cinema and the worlds biggest water fountain display, it literally is every girls dream!!


Breakfast- 100 Dirham each per day for a continental breakfast buffet (approximately £22) 

Taxi fare to Mall- 92 Dirham (£20). Time from Hotel to Mall approximately 15minutes.


Although 90% of the time we were just window-shopping and gawking in amazement (partially because our luggage was already overweight, also due to majority of the shops being designer and expensive!), I did manage to pick some items up in Sephora, which I will review for you guys in the upcoming weeks. I could have spent the whole holiday solely in Sephora- it was humongous!

After leaving the mall in the evening we decided to source the train to save us money for the remainder of the trip. The train passes back cost 44 Dirham (£9.50) for the both of us! Just under half of the taxi cost. We selected the daily-unlimited use passes meaning we could come and go as frequent as we wished. The train system was very straightforward to use as well as the cleanest public transport I have ever been on in my life. There are lists of rules to obey whilst commuting; no food, no drinks or no chewing gum are among the many.

On the route home we jumped off at the Mall of the Emirates to do some more ‘exploring’. Again, the Mall was ginormous with so much packed under one roof, including a ski slope!

As the sun went down we were able to manage the heat and decided to go to the beach at 7:30pm. So after a quick stop in the hotel to grab a bikini and swimming trunks, we took a dander down the marina. The sand was like white dust, the sea like bath water and the skyline picturesque. The walk back from the beach revealed a lit up Dubai and what a view it was.


A quick  stop back in the hotel to wash the sand from ourselves before heading out to dinner. Tuesday night is ladies night and I was off out to take advantage of my free drink! We went to Pier 7, which consisted of 7 different restaurants;  Fume, O’Cacti,  Cargo, The Scene, Abd El Wahab, Asia Asia & Atelier M.

We decided on eating dinner in Asia Asia (Floor Six), and it was incredible! We were sat on the balcony overlooking the lit up sky line & the promenade below with all the big expensive yachts docked.

Tuesday night is Ladies Night in many venues across Dubai. The places we went I got 3x free tokens to use towards drinks. This was actually brilliant considering how expensive drinks are in Dubai. Ofcourse mine was a G&T every time but there was a variety of spirits and cocktails to choose from.

A G&T cost around 50 Dirham most places (£10.90).


Day 3- Wednesday 5th July

Day three was special, I woke up to a gift from Niall to mark the beginning of our seventh year together (cutie-patutie).

After stuffing our bellies at breakfast we filled two backpacks and headed on our way for the day. We dandered over to the train station (5 minute walk from our hotel) and got off a stop early so we could walk towards the Dubai Mall in order to catch a birds eye view of the Burj Khalifa.

Tip- take a bottle of water and a change of top in your bag! Sweat patches- not so cute.

After taking a few pictures we walked to the Dubai Mall as we wanted to go to the Aquarium.

The 10-million litre Dubai Aquarium tank is located on the Ground Level of The Dubai Mall. All different packages are available depending on how much you want to see and do.

We opted for the ‘Explorer’ package as this entailed a glass bottom boat trip which was pretty cool. Continuing to the underwater zoo where we seen animals such as penguins, alligators, parrots, iguanas, otters, turtles, crabs, and jelly fish amongst many.

Explorer Package120 Dirhams each (£26)


We came back and had a few drinks in our hotel room and then headed down to the hotel bar. Dubai is strict on people being drunk in public so we always limited ourselves when we were out and had our own drink in the hotel room to enjoy without worry.

Tip- Buy a bottle of drink in duty free to take with you, we didn’t come across one off-licence in Dubai.


Day 4- Thursday 6th July

Our final day in Dubai! We started the day off at Zero Gravity, which is like a mini Ocean Beach (Ibiza). Great music pumping, sunbeds galore, drink, food, a cool ass swimming pool and access to the beach (the ocean was actually hotter than the pool water!). Upon entry we received tokens to use towards food and drink to the value of 75 Dirhams and the meal we had was absolutely gorge.


Entry was 250 Dirhams for a couple (£55)  or 150 Dirhams per person (£33). Note: Management only class a couple as a male and female.


We bought tickets in the Mall the day before for an evening slot to visit the the worlds tallest building, the Burj Khalifa. After a security check we were greeted with Arabic Tea and local delicacies before visiting 3 floor levels; 148, 124 &125!

Anyone who knows me knows I don’t do these kind of heights, I walked around the viewing deck with my back against the wall grasping on for dear life to anything around me! It was terrifyingly high, I legit felt dizzy, and nauseous feeling as though I were on a boat! Niall reversed me up to the window whilst I shut my eyes, opening them for a photo and sprinting back inside as soon as I heard the camera click!


Cost to go to the observation decks- 700 Dirham for both of us (£152)


A friend of Nialls had recommended we go to Madinat Jumeriah for a stroll about and some dinner. The Madinat did not disappoint, walking in it had a real authentic Dubai feel about it with a strong smell of essence lined with market stalls. When we got out the other side the hotel resembled a manmade Arabian version of Venice with its cute waterways, little boats and chilled vibes. There was an amazing view of the Burj Al Arab (the worlds only 7* hotel).  We went to dinner at Trader Vics in the Madinat and it was beautiful. The atmosphere was buzzing, there were singers, belly dancers and chefs cooking your meal beside your table.

After dinner we returned to our hotel to repack and be set to leave at 6am for our flight to Sydney!


Recommended– Visiting Dubai at a cooler time of the year, it was far too hot and humid to even try lie out for a sun tan! Although i thoroughly enjoyed my Dubai Break, I would defiantly visit at a different time of the year next time so I could experience the Desert Safaris and be able to walk for more than 2 minutes without profusely sweating through every pore in my body!

Currency– Dubai is a closed currency, meaning you can’t buy Dirham outside of the country. Either use a travel card, take cash to exchange in the airport (Sterling) or use your bank card to withdraw Dirhams directly from the ATM machine. There are a number of currency exchange desks in the airport as well as ATMs, the exchange desks in the airport offer a slight lower rate at 4.3 Dirhams to a £1 in comparison to the 4.6 Dirhams offered in the Malls.

Clothing– In certain areas you are expected to be wearing appropriate clothing. No eating dinner with tops off, covering up in holy mosques, walking through the Malls. I always carried a light shirt in my bag that I could pop on if we came across the signs for ‘Appropriate Clothing’.

Time Difference– Dubai is 3 hours ahead of UK time.

Tipping– I tend to tip wherever I go anyway. You aren’t expected to tip in Dubai but its always nice to show your appreciation to people for their services. Plus 5 Dirham is only like £1!

Seven Stages Of Emotion After Booking My One-Way Flight

Stage One- Excitement

I’ve just booked flights for the trip of a lifetime, somewhere I’ve wanted to visit, dreamed of traveling and exploring for as long as I can remember. Finally I’ve plucked up the courage to take the first step, confirming the date of departure. What is there not to be excited about? Turing the page to a brand new chapter, welcoming a positive lifestyle and having an incredible adventure to look forward to. I talked about it constantly, but strangely it felt like I was talking about someone else’s venture, ‘this couldn’t be real life?’


Stage Two- Organisation

Organising visas, working more shifts for extra Dollaaa, continuously researching my destinations on Google, searching for advice from other travellers and composing my own ‘to-do’ list. Trying to get the balance right between saving for the trip & squeezing in as many memories with friends and family as possible before jetting-off. Suddenly my calendar right up to July was booked up with not a day to spare.


Stage Three- The Single Digit Countdown

9 days to go, at this stage it still felt very surreal. I woke-up just two days before leaving with severe anxiety, knots in my stomach feeling sick with nerves, the fear of the unknown really got to me. The thought of saying goodbye to the most incredible set of friends & family killed me. The realization had hit me like a tonne of bricks and boy was it was a hard feeling to shift. I was doing everything in my power to stay positive not only for myself but for the people around me. The positivity book was out in action and the feel good tunes were pumping, as my boyfriend continuously chanted ‘PMA, PMA’ in my ear! (Positive Mental Attitude).


Stage Four- Packing Up Life

‘Will I take this, should I take that, but will I wear it?’ Prioritising an entire wardrobe into a 32kg limit? Difficult! With the help of friends I created a Yes, No, Maybe pile and whittled down the items of clothing to a more manageable number. I closed my suitcase an hour before leaving for the airport. I couldn’t bring myself to do it any earlier as each stage became more real to me and emotionally I wasn’t ready to ‘seal the deal’.


Stage Five- The Goodbyes

The part where it literally feels like your heart has been ripped from your chest and stomped on. The hardest part about leaving by a long shot. This stage seemed to be missing from all my Google searches; no one prepares you for the heartache of leaving behind your everything. Positively looking at it though, how lucky am I to be surrounded by such incredible people to make saying Goodbye so hard? I know each and every one of them will be standing with open arms on my return, and for that I count myself blessed.


Stage Six- Checked In Sipping G&T’S

The airport drop. Waving goodbye the whole way through the security line my emotions were all over the place. After entering through the other side the positivity started to flow back in and the excitement levels rose. The atmosphere and buzz in the air had me feeling like a child at Christmas. New realisations occurred. Thinking of the endless possibilities on the horizon. Sitting in the airport lounge with a G&T toasting to our year ahead, the excitement was pretty hard to contain.


Stage Seven- Destination One

I landed in my first destination (Dubai) and a feeling of ‘WTF?’ set in, the disbelief that I’ve actually done it, packed my life in a suitcase and am about to take on an adventure of a lifetime. But yet, somehow it feels like Dubai has been an incredible holiday and I will be returning to the Emerald Isle come Friday not moving on to another destination. I’ve learned to turn the fear of the unknown into positive excited energy and I am ready to grasp life and embrace the year ahead!


Just a note to say thank you to everyone for the support so far, the response has been amazing!

I will have my Dubai blog post up on Sunday with detailed recommendations and advice on holidaying here.

Chat soon my lovelies,

GemKen x


My New Chapter


To: All users

Subject: OMFG I’ve made a blog

Date: The birth of GemKen Blog

Time: Time for something new


Hi All,

I’m aware that the beginning of this blog resembles that of an office email- well that’s all I’ve known this past while but it’s all about to change!

My boyfriend and I have packed our bags & booked our one way flights to the other side of the world- yep we are off to explore Australia in a matter of days.

So….. why create ‘yet another blog’?

For the past year and a half I’ve been encouraged by my nearest and dearest to jump right in and give it a go ‘why not, you’ve nothing to lose!’ for a while I laughed their comments off and replied with ‘I wish!’ The blogger chats became more frequent and soon developed into more serious conversations entailing recommendations and advice from my girl squad, boyfriend and parents.

Originally I was going to begin in January 2017, but I wasn’t ready, I was stuck at a stage of fear and self-doubt. I was scared of what people would think of me or better yet their comments of who I thought I was?!

Well the thing is I know who I am- I’m Gemma, a fun loving, easy-going girl. I’m the Gemma who will be able to laugh of any negativity, nasty comments and judgement.

So welcome to my blog, my baby, my diary- the place where I will document my travels, lifestyle and anything else I find interesting on my way.

Here’s to a new chapter in my life, I hope you enjoy following my journey.

See you all next Thursday!

Kind regards, (ok first and last time I promise)

GemKen x